By default, files in your DriveHQ account are secure and private. You cannot link your files from other websites / web pages. Sharing a folder does not create static links to your files / folders.
To create static links, you must publish your files / folders.
Please note free members are not allowed to publish files / folders. True members can publish files and folders, however, they cannot publish
any executable files or compressed files. A paid member or a sub-user of a paid group account can publish any files and folders. Published URLs are actively monitored.
Publishing of any illegal contents may result in your account being disabled immediately without warning.
- Navigate through the publishes you have created
- Click the dropdown button next to the address bar on the remote pane, and then select DriveHQ Control Panel --> Manage My Publish;
-or-
Click on Tools on the top menu, then select Manage My Publish;
- To access a published folder, click its share folder (URL);
-or-
Right click one share name, and select Open Share Folder from the popup menu;
- Click on
 to go to the folder visited previously;
- Click on
 to go to the folder visited next;
- Click on
 to go to the parent folder.
- Publish a remote folder
- Select an online file / folder to publish, click on
 button;
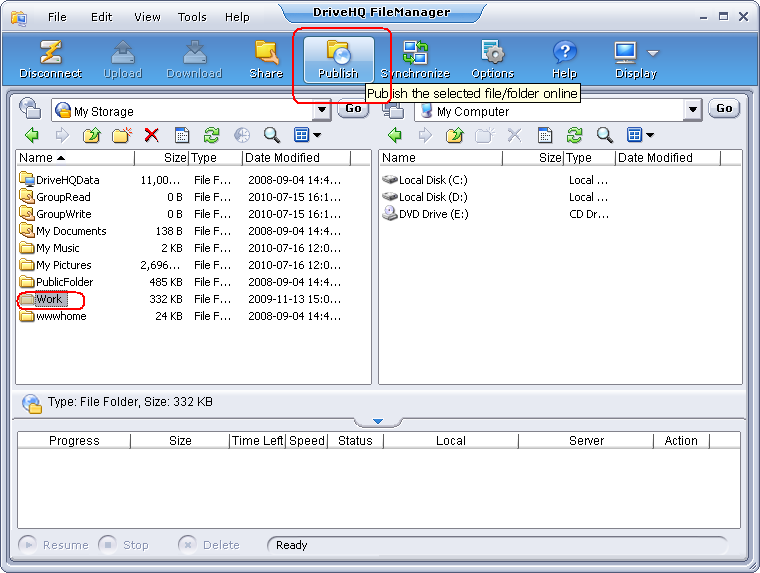
-or-
Right click the file / folder name, and select Publish from the popup menu;
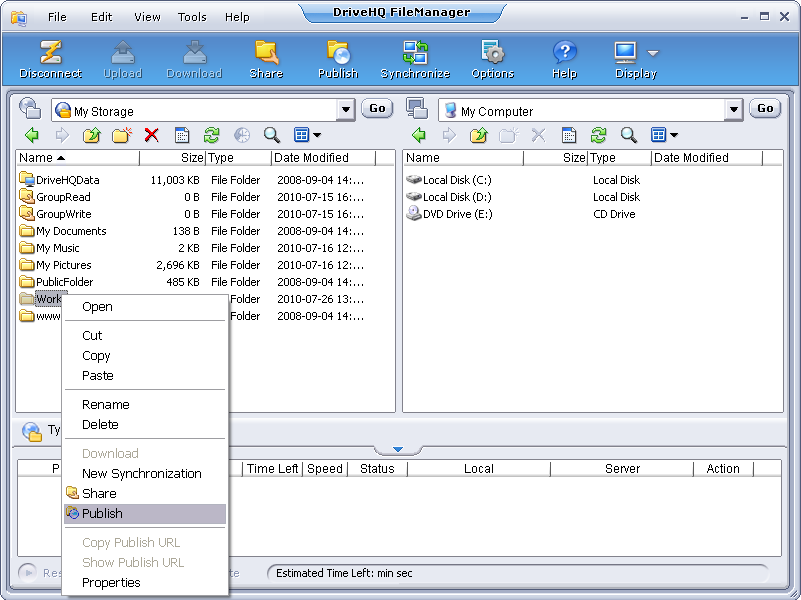
- Once the Publish a server folder screen shows up, enter the following required info:
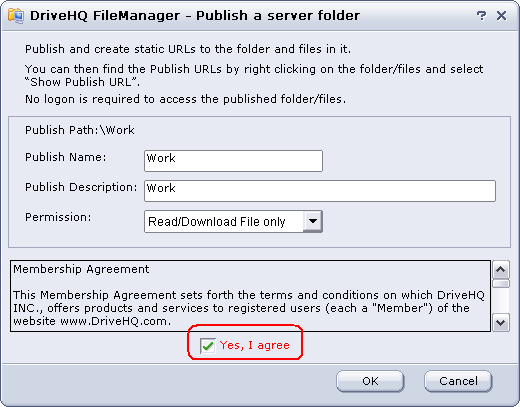
By default, the Publish Name is the same as the folder name, you can change the Publish Name and Publish Description, select a permission level from the following levels:
- View File List/Icon only
- Read/Download File only
Read the Membership Agreement and check Yes, I agree check box.
- Click on OK, and then the Publish is created and a following dialog pops up:
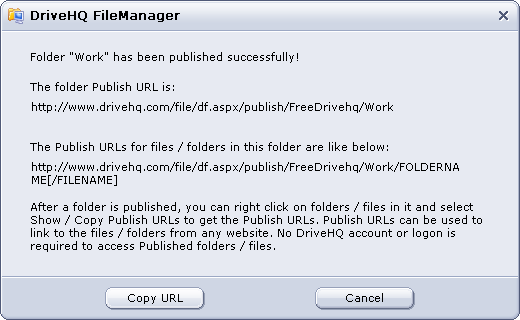
You can click on Copy URL to copy the folder’s publish URL to the clipboard, which you can paste into other application, e.g. Notepad, Word, or any HTML editor. Click on Cancel to close the dialog.
- Publish a local folder
- Select the local file / folder to publish, click on
 button;
-or-
Right click the file / folder name, and select Publish from the popup menu;
- The SetUp Publish screen will show up. Select a destination folder under which you want the published folder to be located, or create a new folder on server, and click on Next button;
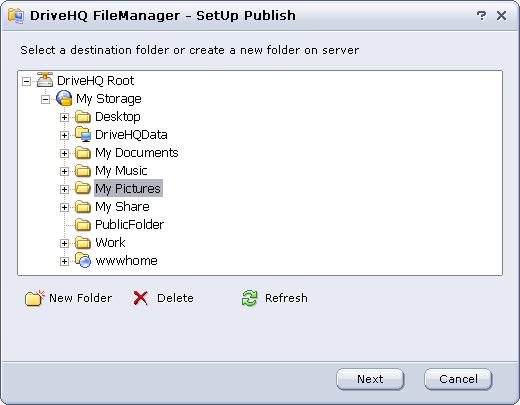
- Then enter the required information for the new Publish in the following screen;
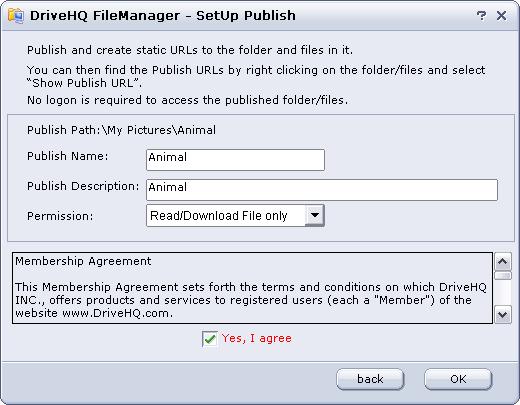
- Click on OK, then local file / folder will be uploaded and the Publish will be created.
- Edit a Publish
- In the Remote Pane, navigate to the Manage My Publish screen;
- Double click the Publish name that you want to edit;
-or-
Select one Publish, and click on  button;
-or-
Right click the Publish name, and select Properties from the popup menu;
- The Edit Publish page will popup. This page is very familiar with the Publish a server folder page;
- Click on Save after you finish the modifications.
- Delete a Publish
- Under the Manage My Publish screen, select the Publish to delete;
- Click on
 button or select Delete from the right-click popup menu;
- The system will pop up a confirmation message box. Select Yes to delete the Publish or select No to cancel this operation.
- Get the Publish URLs
You can more efficiently get multiple file / folder publish URLs. Just visit any published folder, select files / folders in it, then right click on the files / folders, select Show Publish URLs. It will open a new dialog as follows:
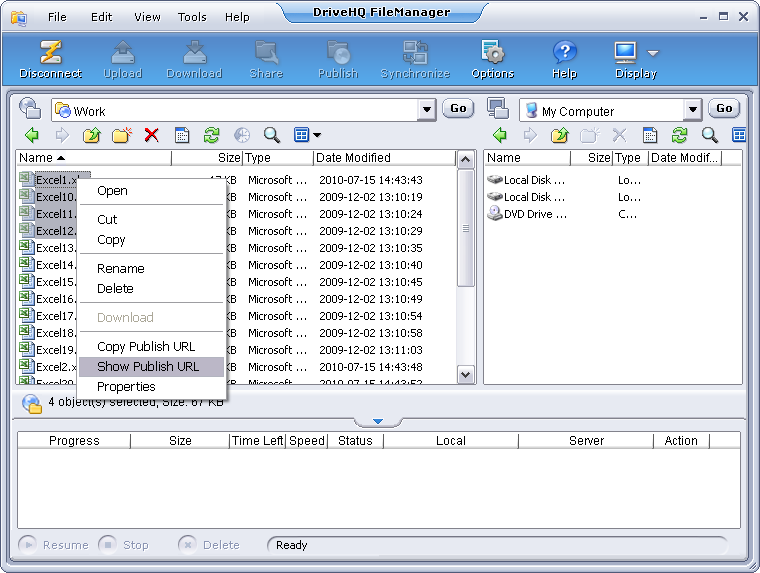
To get the publish URLs, please right click on the selected folders / files, then click on Show Publish URL. It pops up a dialog as shown below:
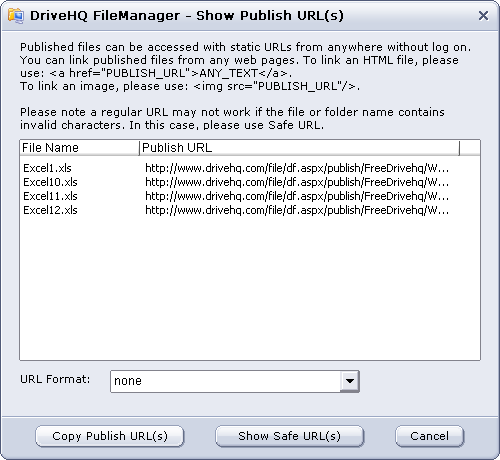
You can copy the publish URLs into your Windows clipboard and paste them into other applications, such as Notepad, MS Word or any HTML editors.
The above publish URLs has a pattern of:
https://www.drivehq.com/file/df.aspx/publish/OWNER_USERNAME/PUBLISH_NAME/FILENAME
If you want to hide your username and folder name, you can click on the Show Safe URL(s) button, which will change the Publish URLs into a new format as shown below:
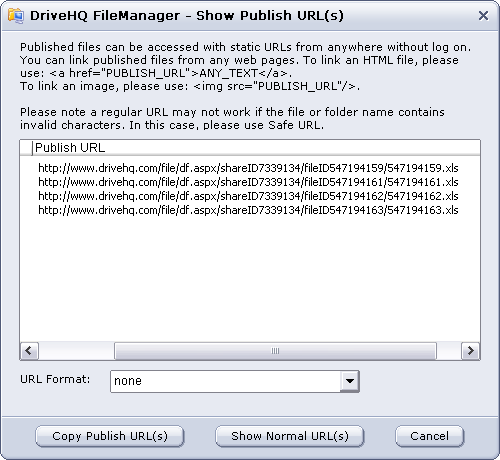
The safe Publish URLs hide the username, publish name, folder name and filename info. So the URL is more secure; moreover, safe URLs are guaranteed not to have any special characters that might affect the validity of a URL. On the other hand, a regular Publish URLs may not work if it has special characters in the folder name / file name, etc.
Please note when other users visit your published (or shared) folder(s), they will be using your account download bytes. So if you expect a lot of users will access your published folder, please make sure your account has enough download bytes.