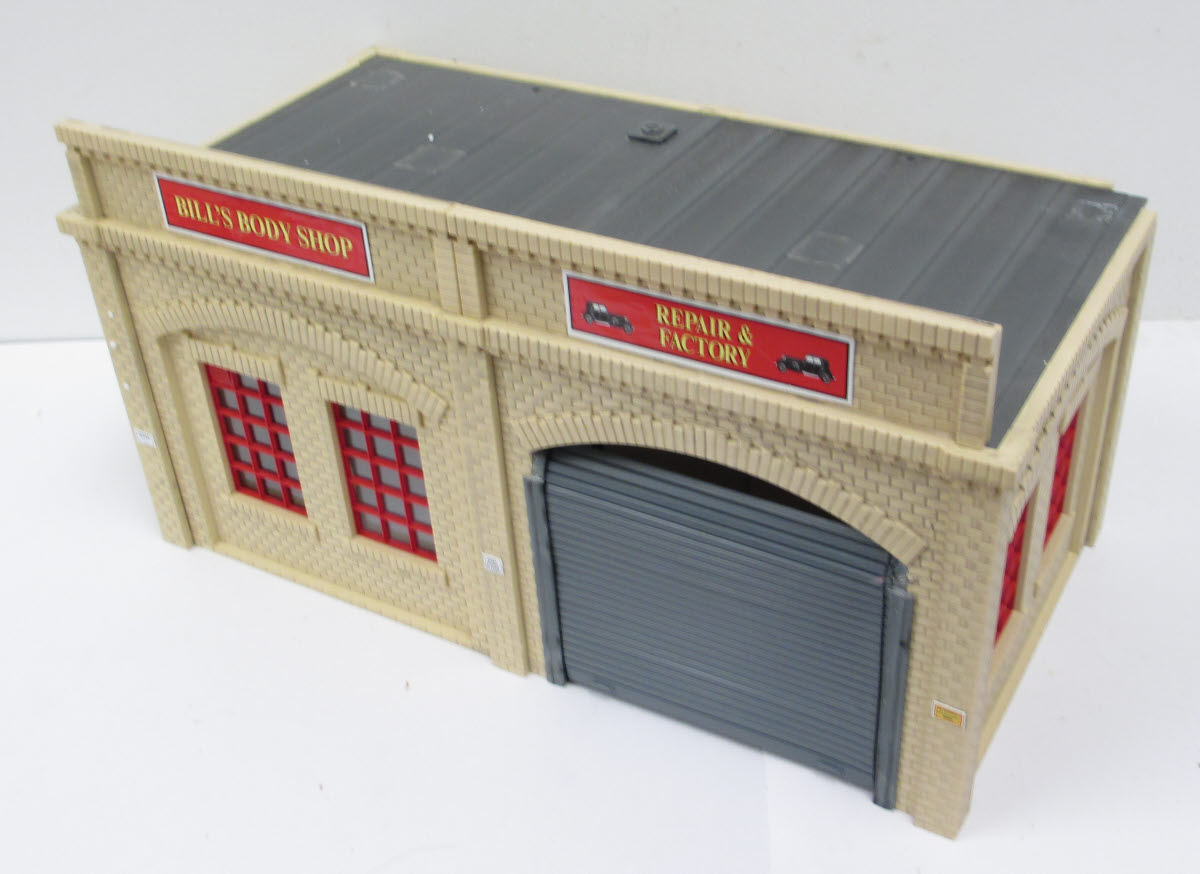
| I had plans to build a diorama for a long time, but I never found the inspiration how to do it. It had to be the interior of a 1930’s garage, with all kind of period correct things in it. But last year I suddenly had an idea. I was looking for some diorama items on the internet and found a picture of a G-scale Piko kit of a garage, Bill’s Body Shop. See picture below. |
 |
|
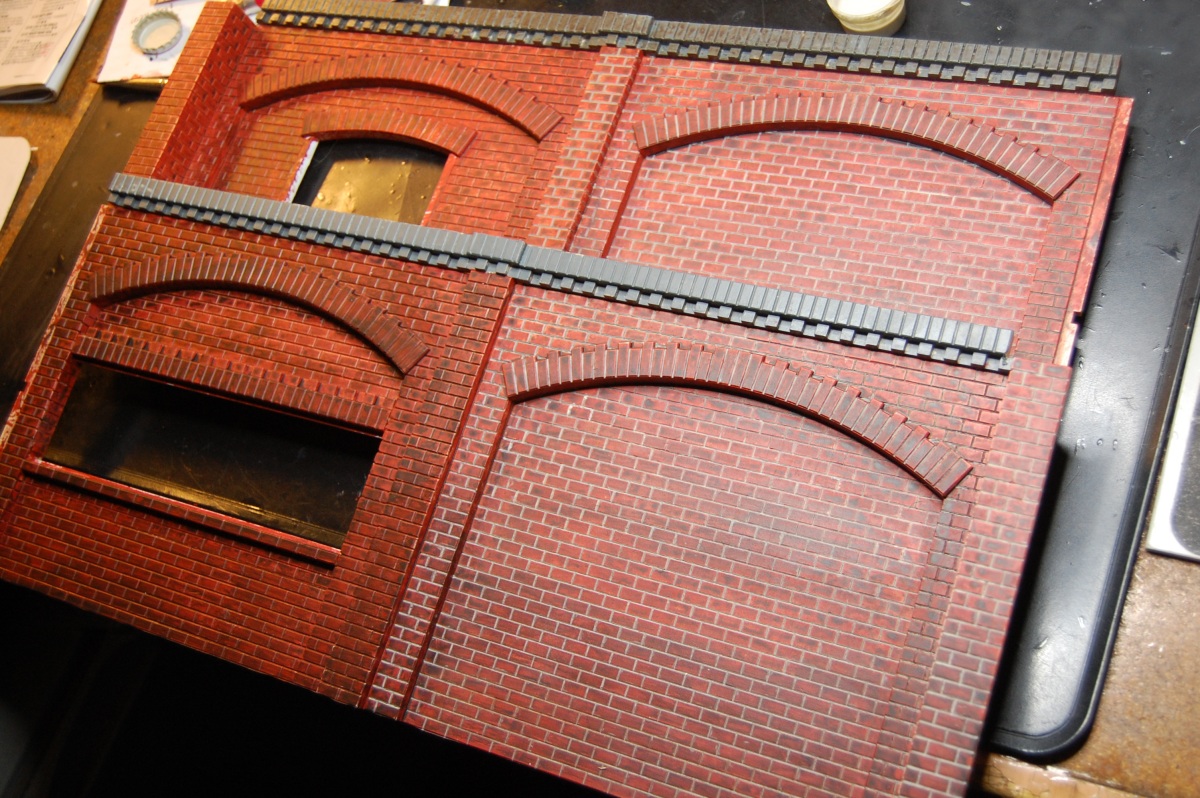
I remembered that that kit had six separate walls, all with nice
brickwork, and suddenly thought: What if I don’t build that kit as
it should be, but inside out? Or more correct, outside in? I found a reasonable priced kit on eBay and started working on it. Ofcourse I had to make some modifications, but it all fell together as I had in mind. All parts were white plastic, so the first thing after the main construction was completed was to get the walls painted in a nice brick color. I used the same acrylic paint as they use for paintings. First layer was a red iron oxide color for the main brick color. Then I applied a wash with Vandyke brown. And finally I filled the joints between the bricks with a medium grey wash to simulate the mortar. On this picture you can see the difference between the before and after of that grey wash. |
 |
|
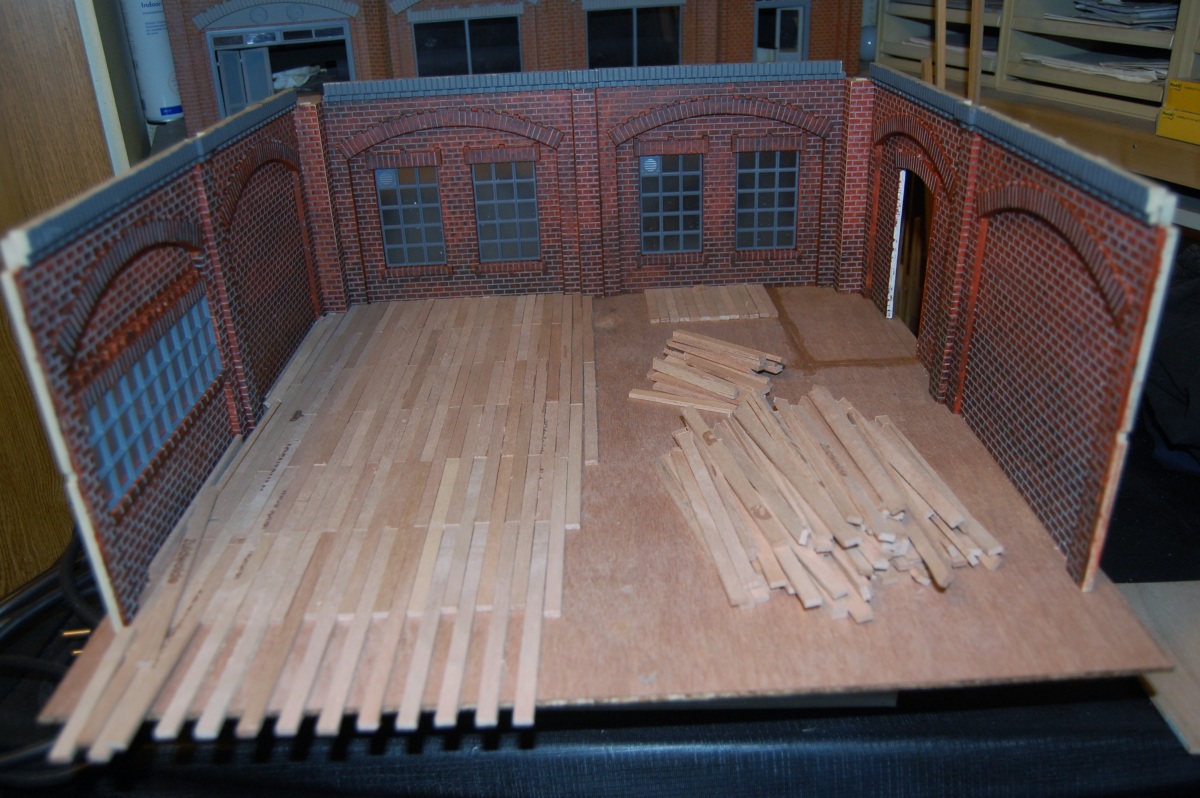
Next problem: the floor! I somehow didn’t like the idea of having some kind of concrete floor.
A wooden floor seemed more appropriate. And here I got some help from an office colleague who smokes little cigars.
These cigars are in wooden boxes and I always get the empty boxes. Lots of wood at hand in a nice color! After cutting about 180 little planks with my table circle saw from those boxes I could start my wooden floor. Work in progress on the next picture! |
 |
| After sanding the floor to get a smooth finish I applied furniture oil to get a nice darker color. And ofcourse I didn’t forget to make some real nice oil stains on the floor. Here is the completed floor, still looking very clean without oil stains. |
 |
|
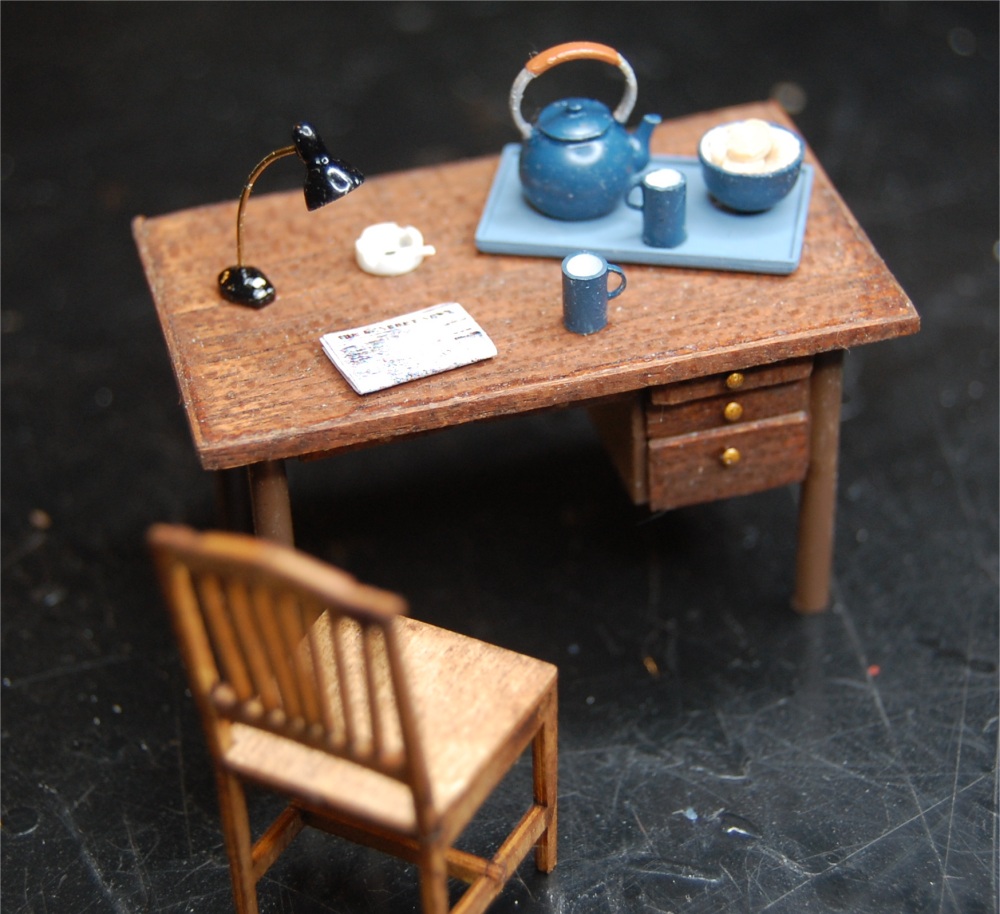
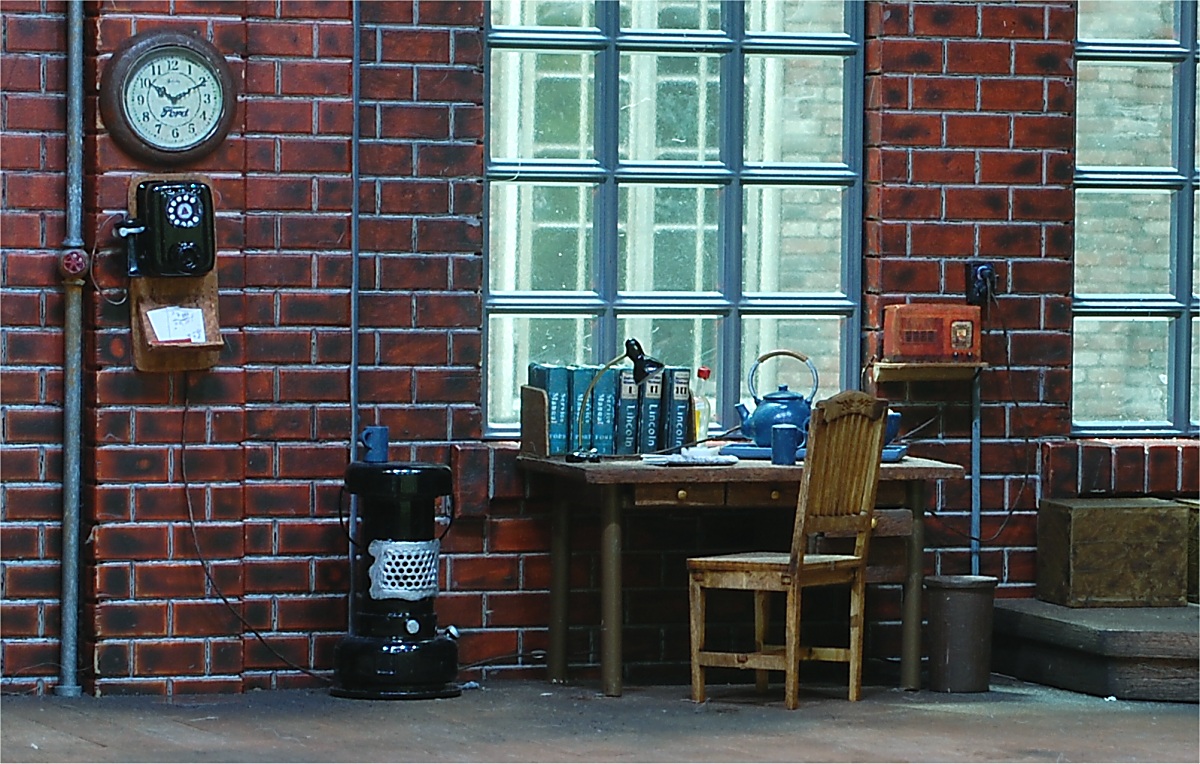
After that main construction work it was time to fill the garage with all kind of little details.
And that took a long time, a very, very long time. Actually, about 5 months… Here is a close-up picture of the desk (still under construction) in the garage: |
 |
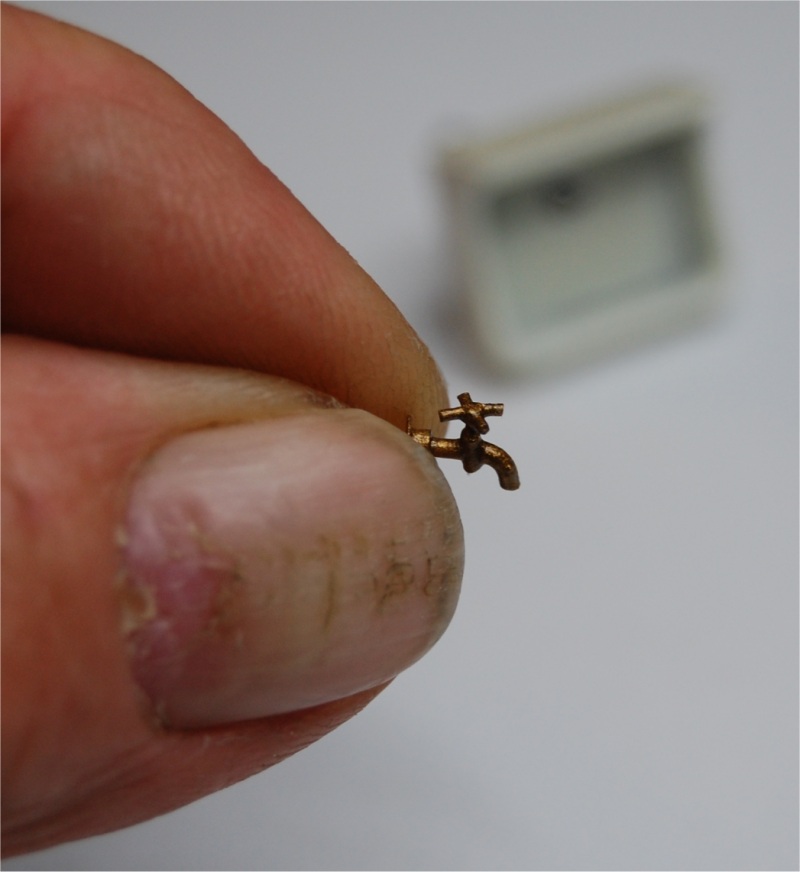
| The tiny faucet I made for the sink (which is just visible in the background): |
 |
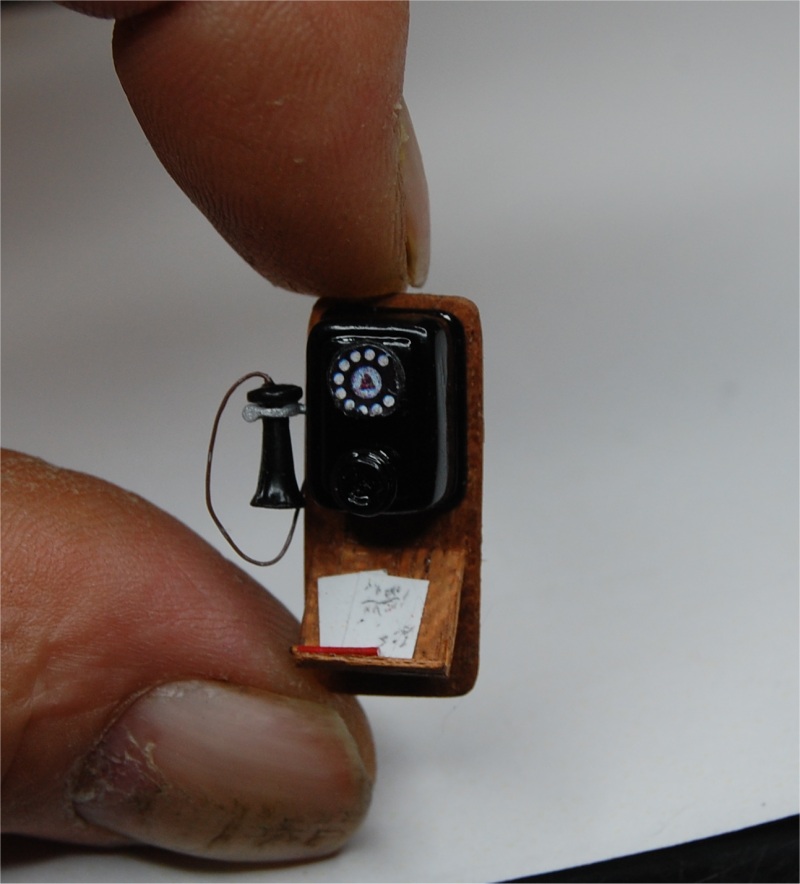
| The Bell telephone including a little red pencil and some paper to make notes: |
 |
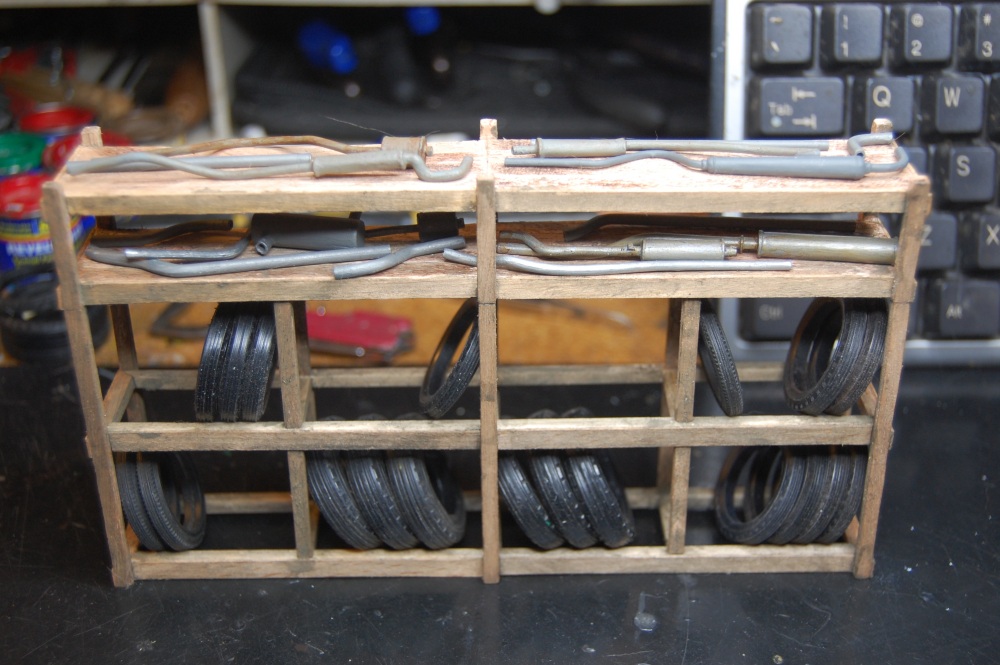
| The tire and exhaust rack (still under construction): |
 |
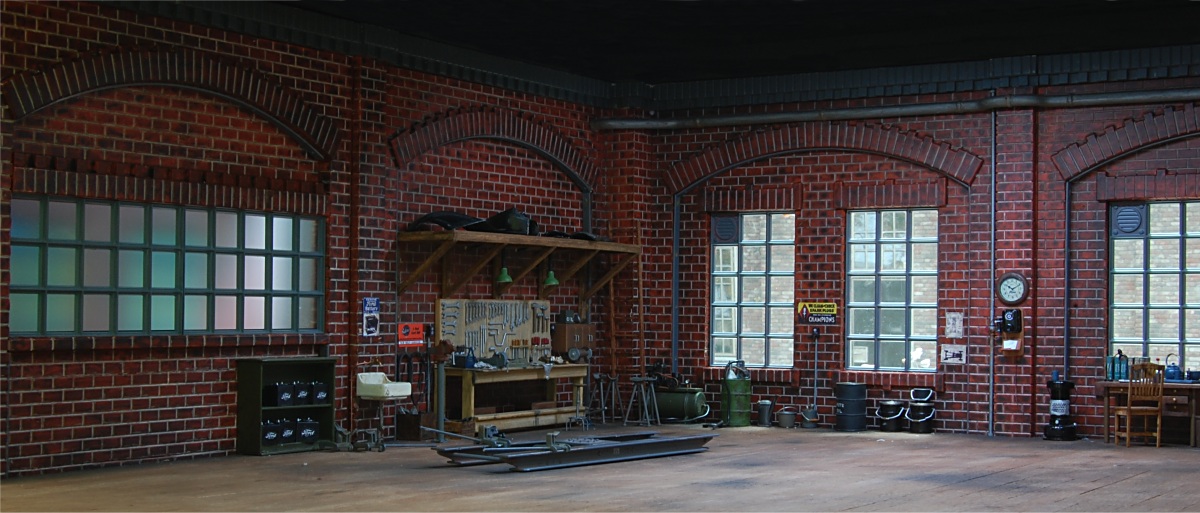
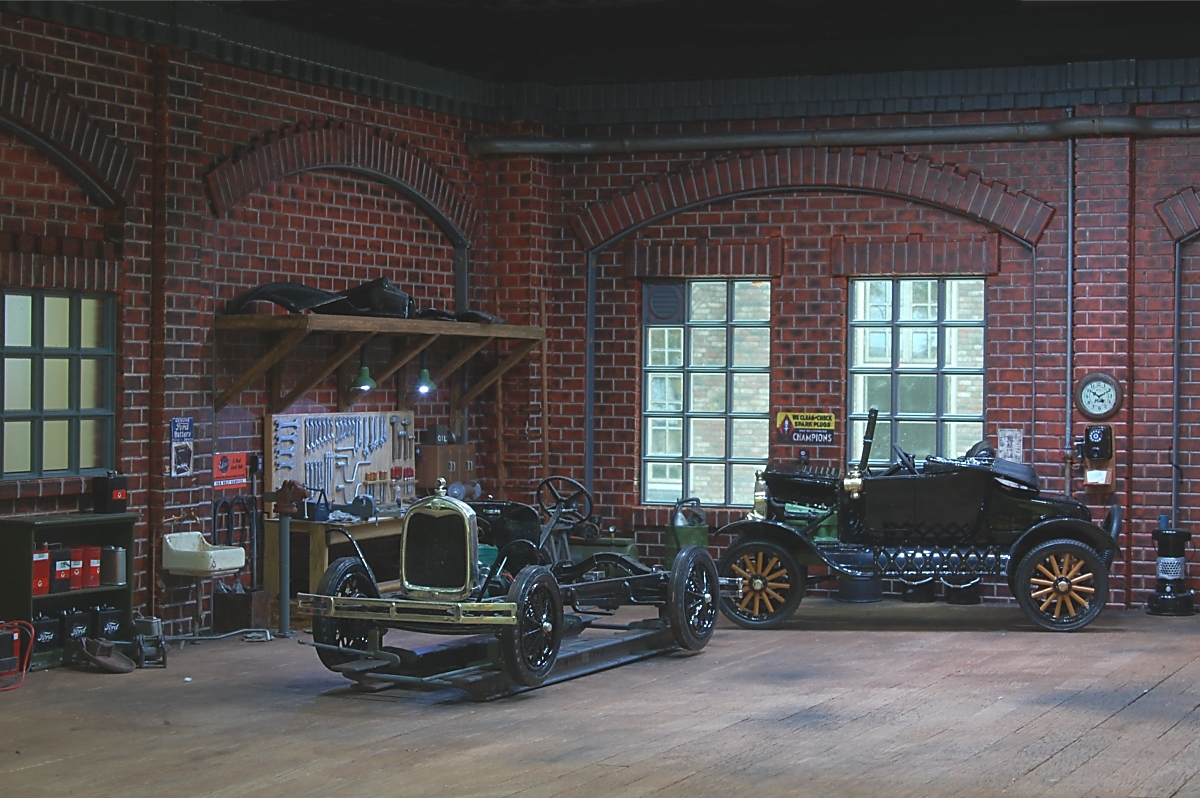
| A few pictures of the almost completed garage, a view to the left and a view to the right (this time with oil stains on the floor): |
 |
 |
| A close-up of the ‘office’ section: |
 |
|
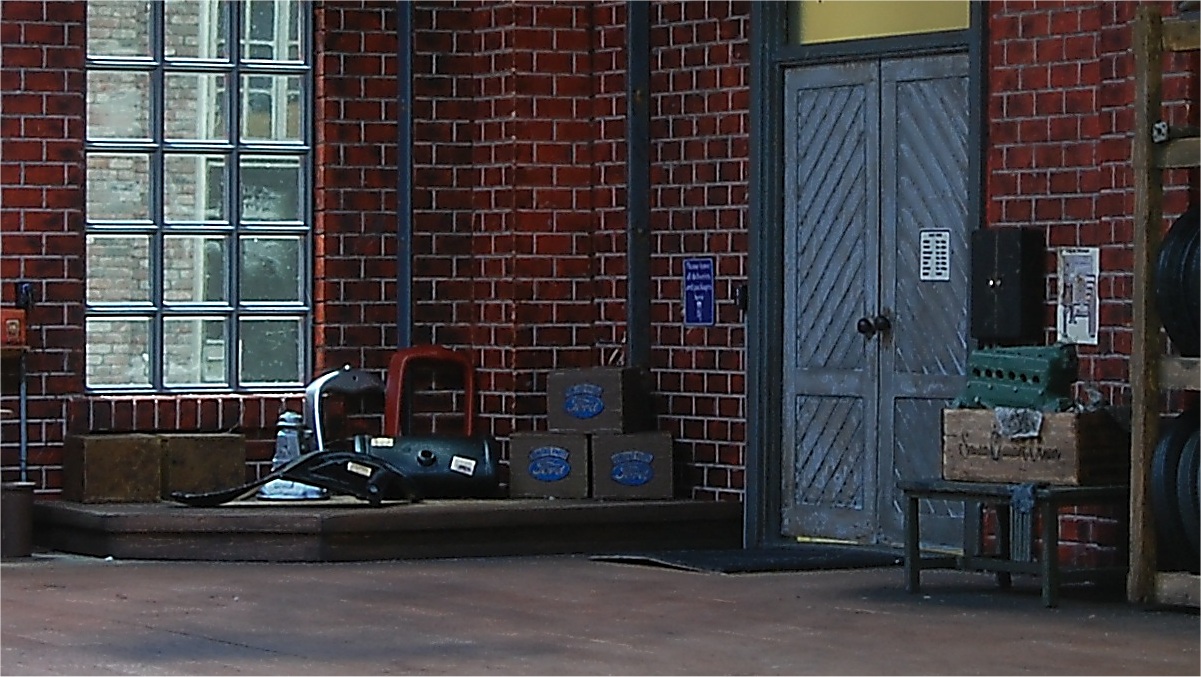
To the right of the office a small platform for the just arrived new parts. To the right of the double door the garage fusebox and a table with an engine block which needs attention: |
 |
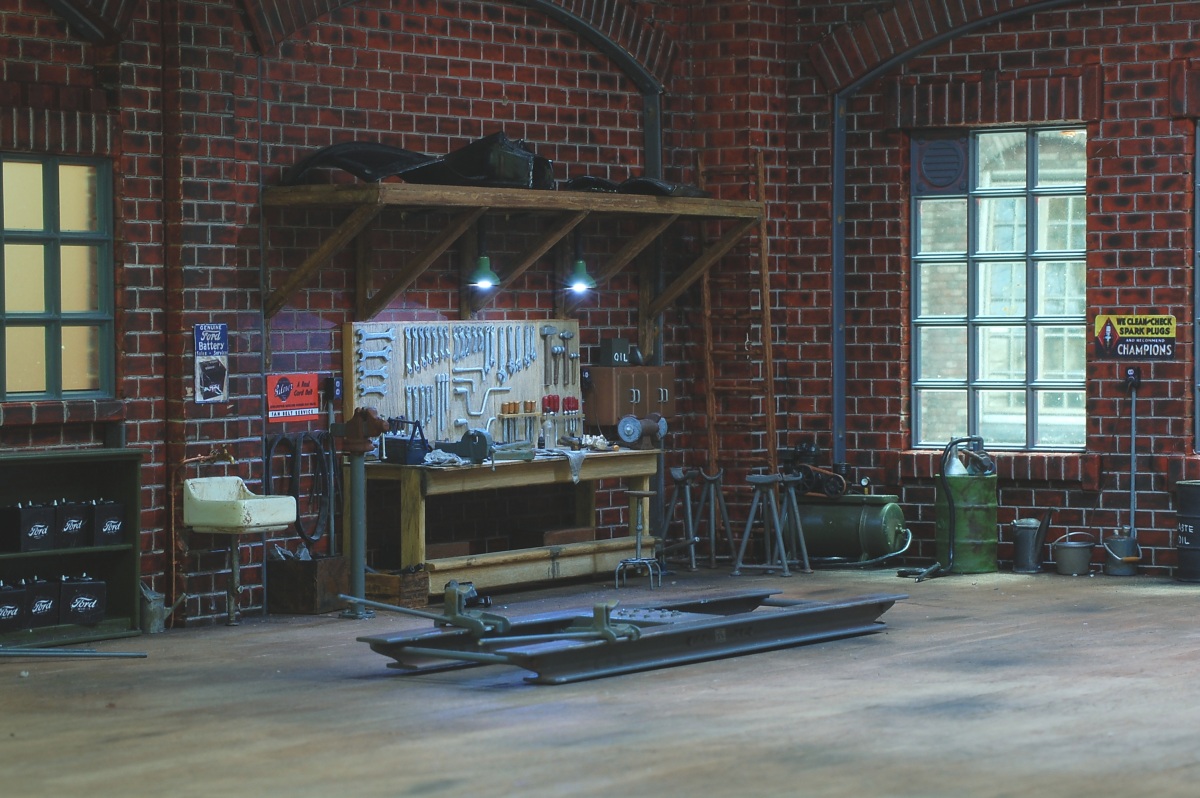
| The hand-operated hydraulic lift and workbench: |
 |
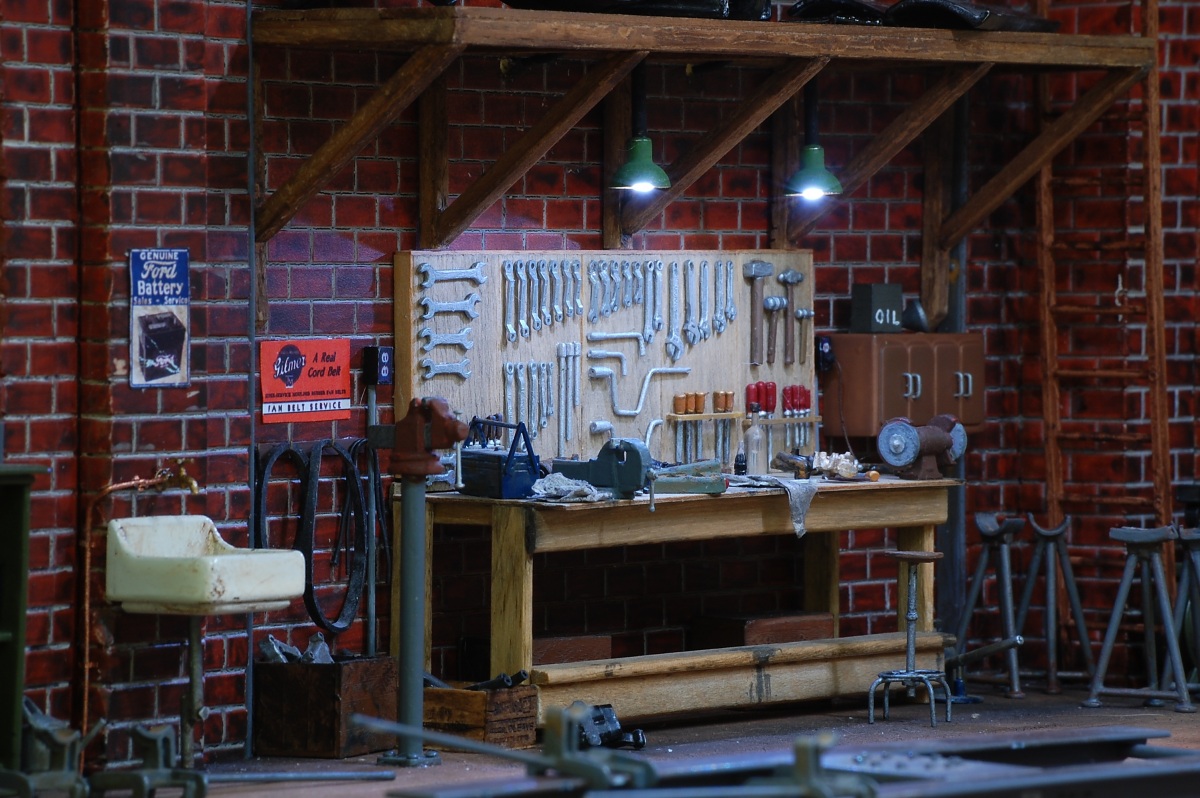
| A closer look at the workbench with all the tools and on the left the (dirty) sink with the tiny faucet: |
 |
| And with some cars in it, the garage is really finished! |
 |